We all watch other language movies and video content with the help of subtitles. To be frank, it serves as a life savior when it comes to foreign language movies or TV shows. In that case, as Kodi has a lot of opportunities to watch content from several sources, you must indeed know how to use subtitles in Kodi. Here let’s see how to download English subtitles on Kodi. Getting a subtitle on Kodi is actually an easy task. Just follow these simple steps below.
If you are a Firestick user, you can follow the same steps to get Kodi subtitles. If you are a new user, see how to install Kodi on Firestick for limitless entertainment.
Tip-off !!
Streaming without a VPN exposes your IP address, making you vulnerable to privacy breaches and hacker attacks. Without encryption, your online activities are more susceptible to monitoring by ISPs, snoopers, and the government. Lastly, accessing geo-restricted content may be impossible without a VPN, limiting your entertainment options. Hence, it is recommended to use a VPN.
Of all the available VPNs, I recommend NordVPN if you ever want to watch the desired movies, TV shows, or sports events on your Firestick without risking your privacy. NordVPN is the fastest and best VPN service provider with global coverage. You can now avail yourself of the New Year's deal of 67% off + 3 Months Extra of NordVPN to stay anonymous.
With NordVPN on Firestick, your internet traffic gets encrypted, so your IP and identity stay anonymous. You can stream the desired content while staying away from the government and other online intruders.

How to Get Subtitles on Kodi Media Player
Here first, let’s see how to install subtitle add-ons that are located in the official Kodi repository.
Step1 – By pressing the Cog icon, which is on the top left corner of the Home Screen, open the System menu.

Step2 – Click on the Add-ons option.

Step3 – Then select Install from Repository.

Step4 – Now click on Subtitles.

Note: In case already if you have installed any 3rd party repositories in your system, then you should select the official Kodi Add-on Repository first.
Using OpenSubtitles.org
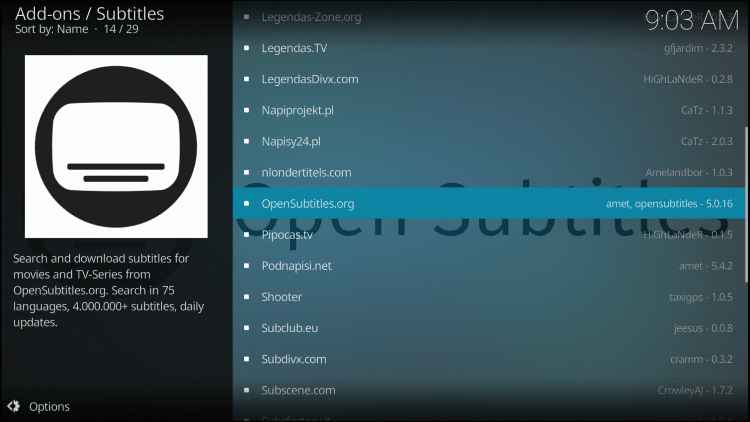
Step5 – Select OpenSubtitles.org from the list.
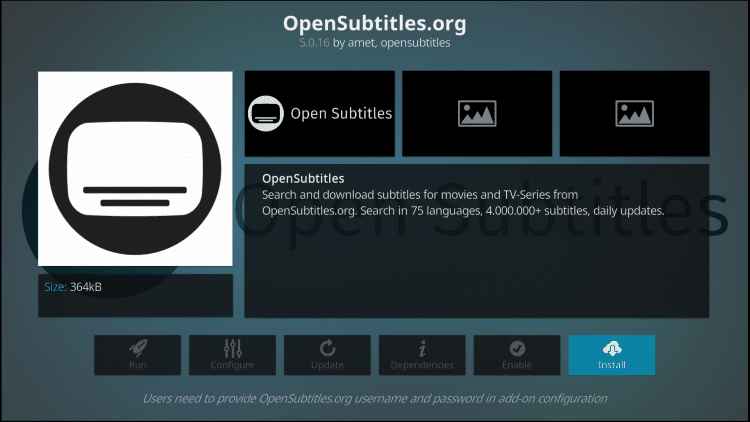
Step6 – Click on the install button. Once installed, you will receive an App Installed notification.
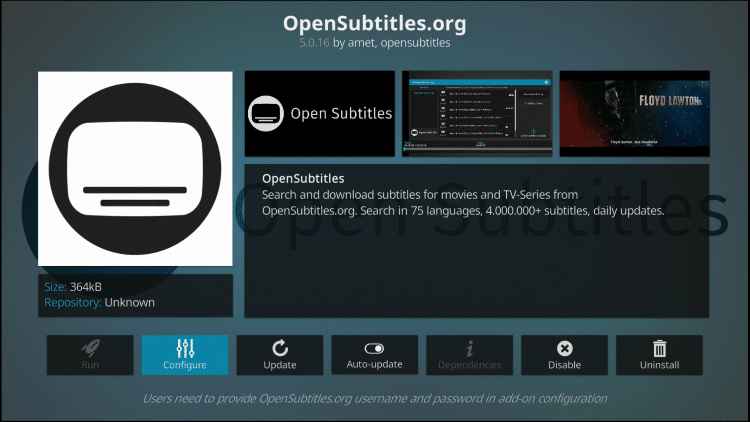
Step7 – Select OpenSubtitles.org again and click Configure.
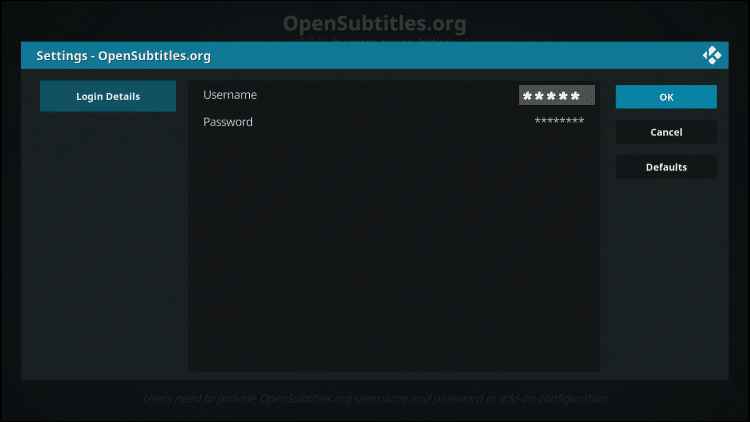
Step8 – Enter your Username and password to log in to OpenSubtitle.org. Click OK.
Using Addic7ed
Step5 – There are many subtitle providers available in the addon list. Here we have selected Addic7ed. Click on it.

Step6 – Click on the Install button on its info page.

Step7: After the installation, select the Addic7ed option again and click Configure.
Step8: Provide your account username and password and tap OK.
How to Set up and Enable Subtitle Preferences on Kodi
After installing the addon, you have to Set up the subtitle preferences in Kodi.
Step1 – Again, go to Home Screen, and by clicking the Cog icon which is on the top left corner, open Settings.

Step2 – Then click on Player.
Step3 – By selecting the Language tab, click on the Language to download subtitles option.

Step4 – Select your preferred language and click OK. You can also select multiple languages.

Step5 – Now you should set the Default TV show service and Default movie service to one of the previously installed subtitles addons.

Step6 – That’s all. You have successfully downloaded the subtitle file.
How to Use Subtitles in a Video on Kodi
Step1 – Play the video for which you have downloaded the subtitle.
Step2 – Click on the Subtitle icon in the bottom corner of the page.

Step3 – Now, click on the Download subtitle option and pick the subtitle file.

Step4 – Then, play the video with the subtitle.
How to Enable Automatic Subtitles on Kodi with Autosubs (Optional)
It may be a bit annoying to enable subtitles every time you want. If in order to solve this, you can enable automatic subtitles in Kodi. To know how to follow the below-mentioned steps.
Step1 – Hover to Home Screen and select the Add-ons tab.

Step2 – Open the Add-on Browser on the top left corner of your screen.
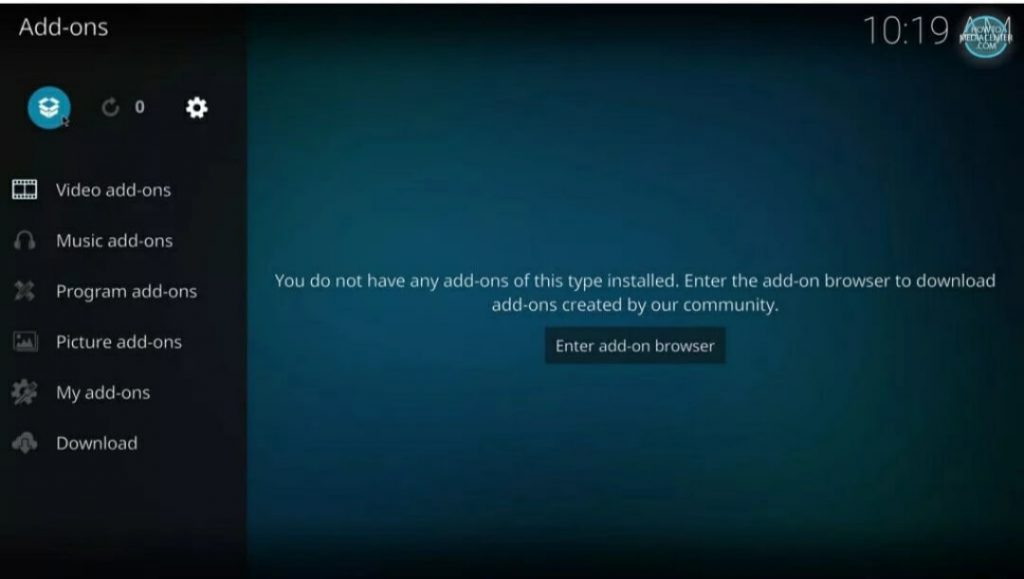
Step3 – Then click on Install from Repository.
Step4 – Select the Services option.

Step5 – Click on Autosubs.

Step6 – Click on the Install button.

Step7 – It will get installed, and the Subtitle Selection Dialog will automatically get opened when you start playing a video.
How to Stream video with Subtitles on Kodi without Registration
There are many subtitle addon that requires no registration. One such alternative for OpenSubtitles.org is Subscene which can be used without any registration.
Step1 – Click on the Setting option from the Kodi Home screen.
Step2 – Tap Player and select the Language option.
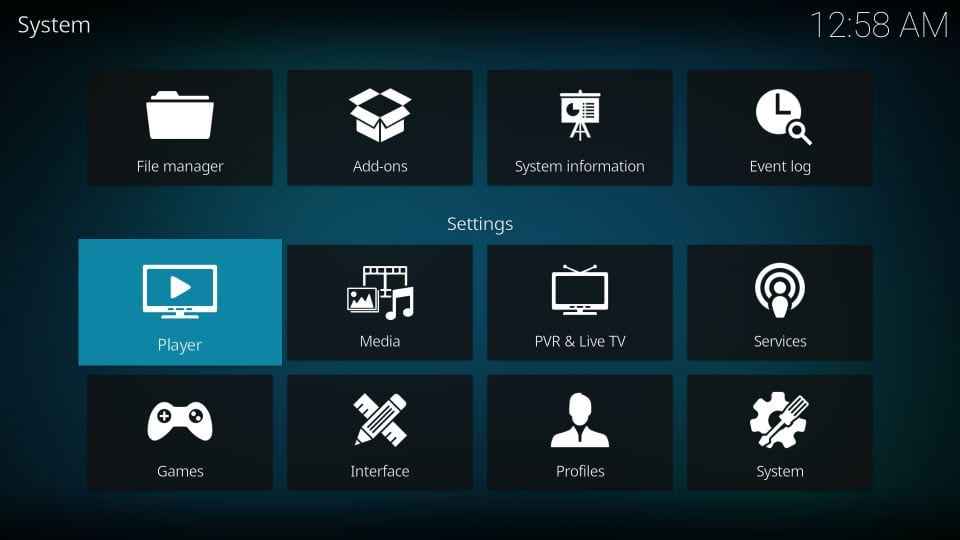
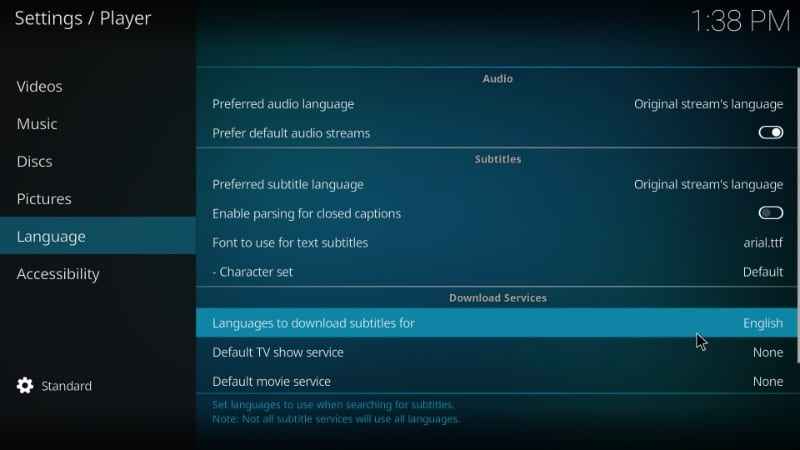
Step3 – Select the Language to download subtitles for option under Download Services and select the desired language.
Step4 – Tap the Default TV show service and click the Get more button.
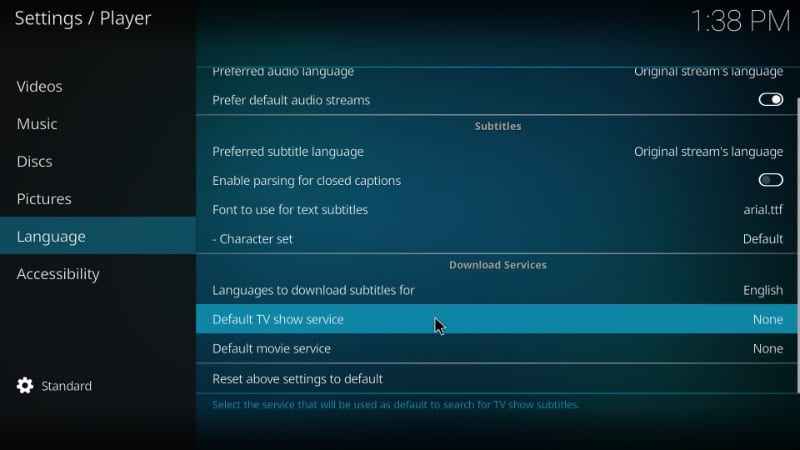
Step5 – Now, download the Subscene.com subtitle and select it to set it as default.
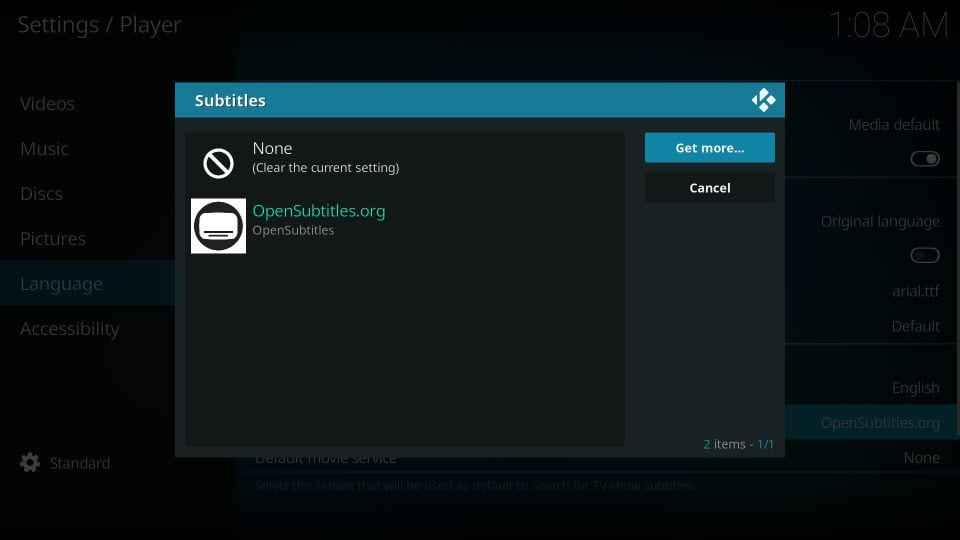
Step6 – Tap Default movie scene and then click on Subscene.com again to save changes.
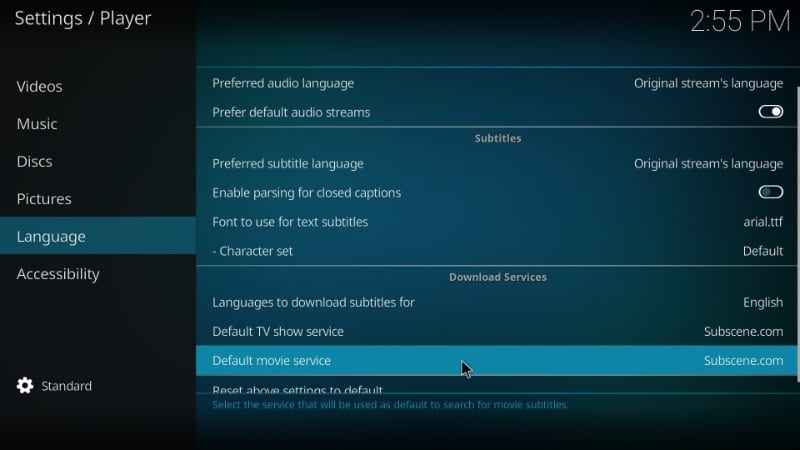
Step7 – Thus, you have downloaded Subscene.com successfully.
Kodi is the best media player with various Kodi addons, skin, Kodi builds, etc. With that, you can also get subtitles on Kodi for streaming other language movies or TV shows. Keep in mind that the video quality of the selected media matches with the file name when you choose subtitles to get the correct subtitles for your video.
FAQs
Shooter subtitle, Caption, VLSub, SubDownloader, Qnapi, and SolEol are some of the best subtitle services for Kodi.
Uninstall the subtitle addons to remove subtitles while streaming.
Ensure that you have downloaded the correct subtitle file to fix it.
When you install the Netflix Kodi addon on your Kodi, you can stream with subtitles using above mentioned methods. Likewise, you can also stream Amazon Prime with subtitles on Kodi.



Leave a Reply